SECTION 9G
INTERIOR TRIM
Caution : Disconnect the negative battery cable before removing or installing any electrical unit or when a tool or equipment could easily come in contact with exposed electrical terminals. Disconnecting this cable will help prevent personal injury and damage to the vehicle. The ignition must also be in LOCK unless otherwise noted.
SPECIFICATIONS
Fastener Tightening Specifications
Application | N•m | Lb-Ft | Lb-In |
Door Pull Screw | 3.5 | - | 31 |
Floor Console Screws | 4 | - | 35 |
Gearshift Housing Bolts | 5 | - | 44 |
Rear Seat Belt Anchor Bolts | 38 | 28 | - |
Rear Seatback Bolt | 25 | 18 | - |
Seat Belt Anchor Bolts | 38 | 28 | - |
Seat Belt Bracket Screws | 10 | - | 89 |
Trim Panel Screws | 3.5 | - | 31 |
SPECIAL TOOLS
Special Tools Table
MAINTENANCE AND REPAIR
ON-VEHICLE SERVICE


Front Door Trim Panel
Tools Required
Removal Procedure
- Lower the front window.
- Remove the front door handle cover and the screws.
- Remove the inside door handle escutcheon.
- Pry off the trim panel using the trim remover KM-475-B.
Installation Procedure
- Install the trim panel.
- Install the front door handle cover.
Tighten
Tighten the trim panel screws to 3.5 N•m (31 lb-in).
- Install the front door handle cover.
- Install the inside door handle escutcheon.
- Raise the window.
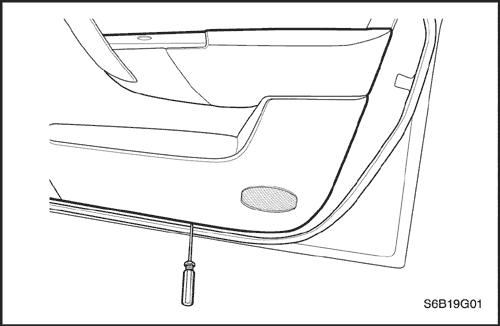
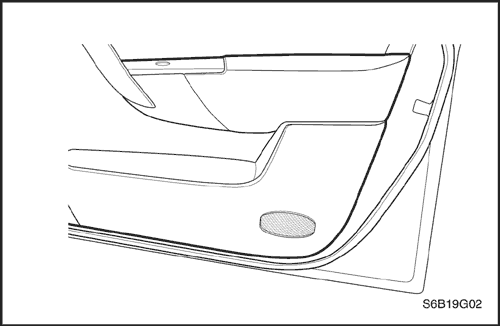
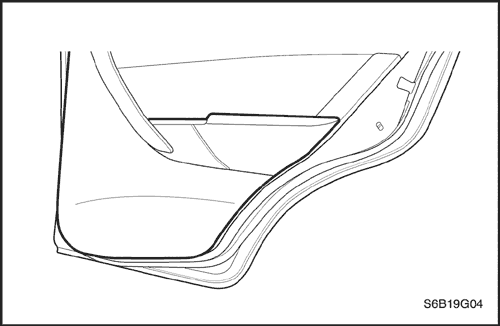
Rear Door Trim Panel
Tools Required
Removal Procedure
- Lower the rear window.
- Remove the rear door handle cover.
- Remove the door pull screws.
- Remove the inside door handle escutcheon.
- Pry off the trim panel using the trim remover KM-475-B.
Installation Procedure
- Install the trim panel.
- Install the rear door handle cover.
Tighten
Tighten the trim panel screws to 3.5 N•m (31 lb-in).
- Install the rear door handle cover.
- Install the inside door handle escutcheon.
- Raise the window.
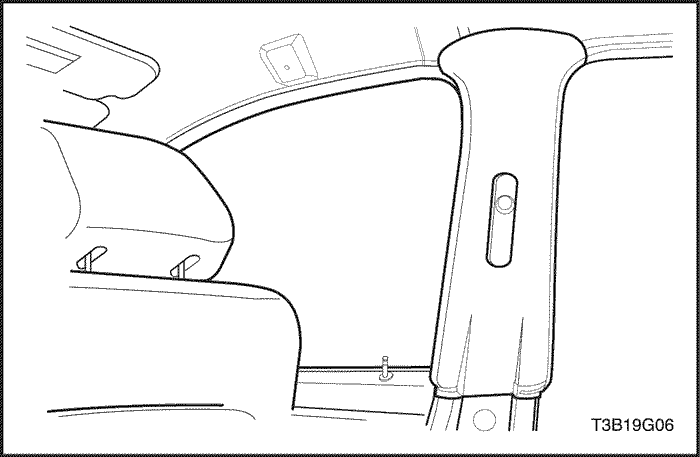
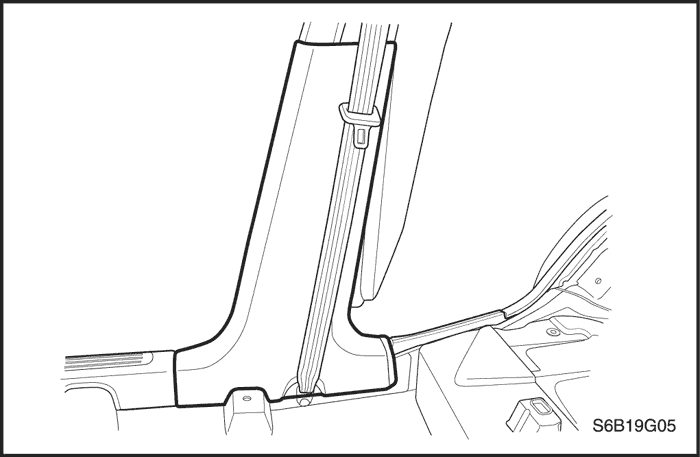
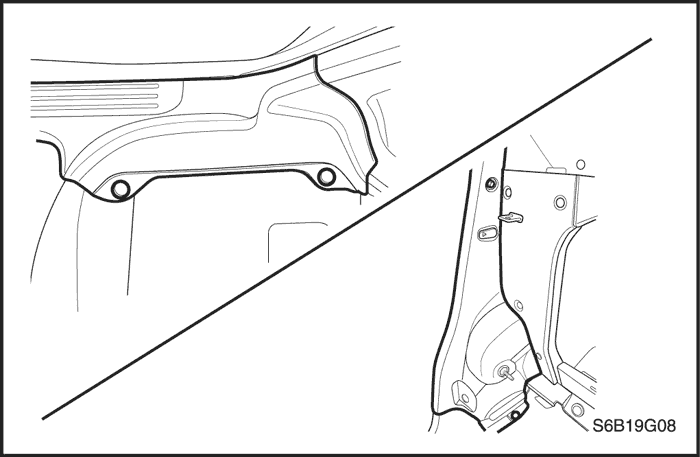
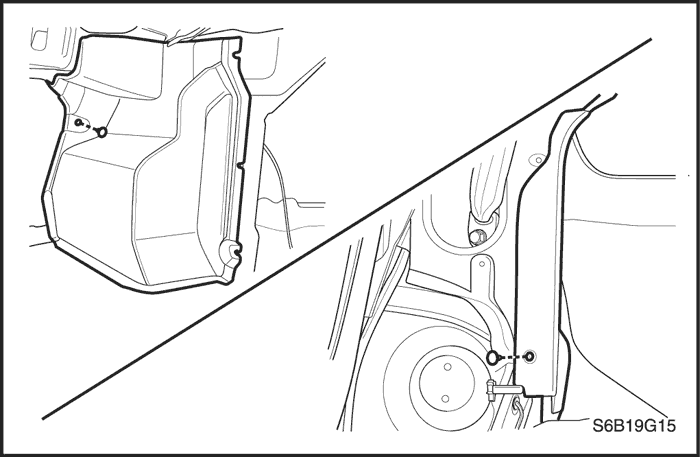
Upper B-Pillar Trim Panel
Removal Procedure
- Remove the bolt and the upper front seat belt anchor.
- Remove the lower B-pillar trim panel. Refer to "Lower B-Pillar Trim Panel"in this section.
- Pry off the upper B-Pillar trim panel.
Installation Procedure
- Install the upper B-pillar trim panel.
- Install the lower B-pillar trim panel. Refer to "Lower B-Pillar Trim Panel"in this section.
- Install the upper front seat belt anchor with the bolt.
Tighten
Tighten the seat belt anchor bolt to 38 N•m (28 lb-ft).
Lower B-Pillar Trim Panel
Removal Procedure
- Reposition the rear portion of the front rocker trim panel and the front portion of the rear rocker trim panel.
- Remove the bolt and seat belt.
- Pry off the lower B-pillar trim panel.
Installation Procedure
- Install the lower B-pillar trim panel.
- Install the front seat belt with the bolt.
Tighten
Tighten the seat belt bolt to 38 N•m (28 lb-in).
- Install the front rocker trim panel.
- Install the rear rocker trim panel to its original position.
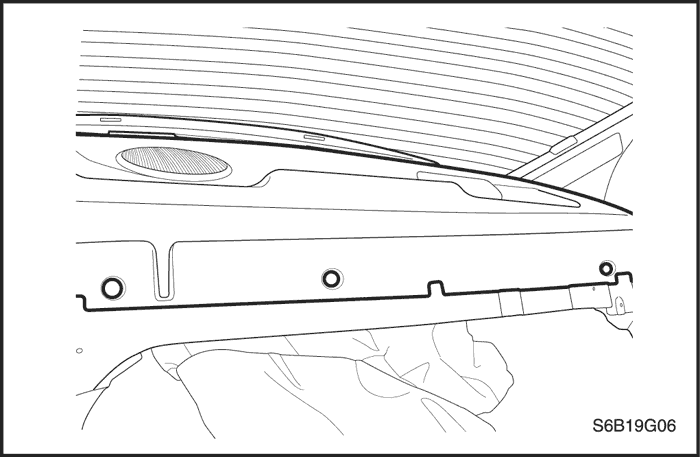
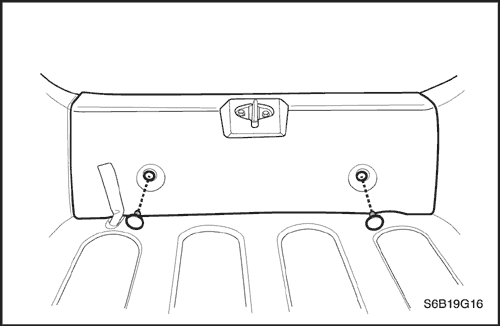
Upper Back Panel Shelf
Removal Procedure
- Remove the rear seatback. Refer to Section 9H, Seats.
- Remove the plastic retaining clips and the deck lid sill plate cover.
Installation Procedure
- Install the rear deck lid sill plate cover with the plastic retaining clips.
- Install the rear seatback. Refer to Section 9H, Seats.
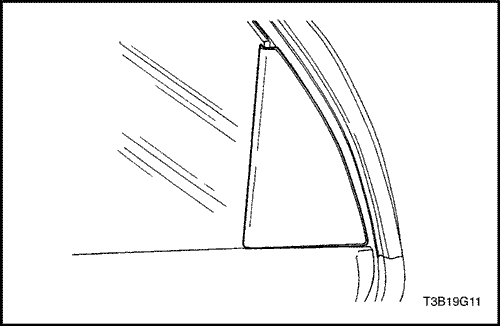
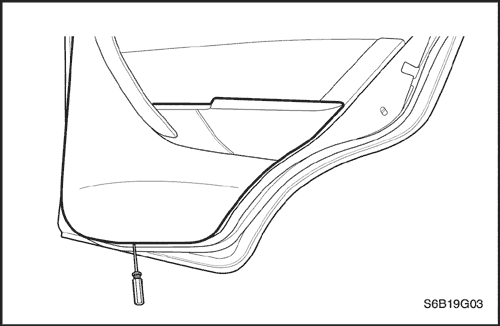
Rear Door Interior Garnish Molding
Removal Procedure
- Pry off the rear door interior garnish molding.
Installation Procedure
- Install the rear door interior garnish molding.
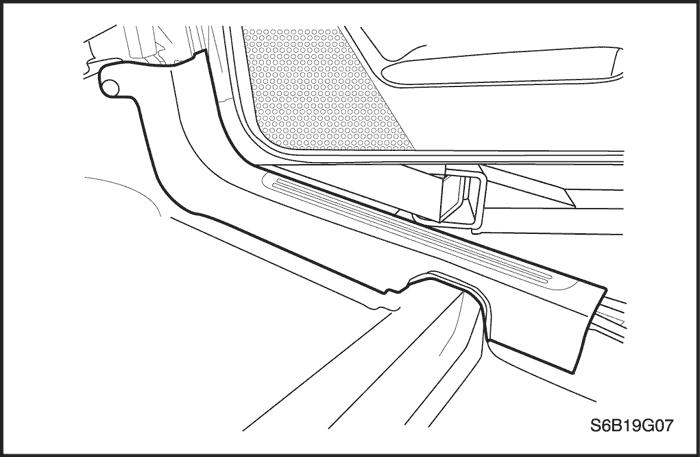
Front Rocker Trim Panel
Removal Procedure
- Remove the screw securing the front rocker trim panel.
- Pry off the front rocker trim panel.
Installation Procedure
- Install the front rocker trim panel with the screw.
Rear Rocker Trim Panel
Removal Procedure
- Remove the rear seat cushion and rear seatback. Refer to Section 9H,Seats.
- Remove the clip securing the rear rocker panel cover.
- Remove the screw securing the front wheel house trim panel.
- Pry off the rear rocker trim panel.
Installation Procedure
- Install the rear rocker trim panel.
- Install the front wheel house trim panel with the screw.
- Install the rear rocker panel cover with the clips.
- Install the rear seatback with the bolt.
Tighten
Tighten the rear seatback bolt to 25 N•m (18 lb-ft).
- Install the rear seat cushion. Refer to Section 9H,Seats.
Floor Carpet
Removal Procedure
- Disconnect the negative battery cable.
- Remove the left and the right rear rocker trim panels. Refer to "Rear Rocker Trim Panel" in this section.
- Remove the bolts and the left and the right lower front seat belt anchors from the B-pillar.
- Remove the left and the right lower B-pillar trim panels. Refer to "Lower B-Pillar Trim Panel" in this section.
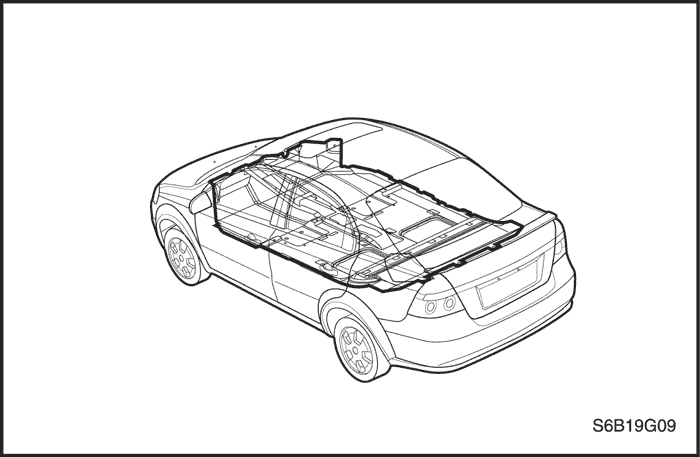
- Remove the front seats. Refer to Section 9H, Seats.
- Pry off the left and the right front rocker trim panels.
- Remove the floor console. Refer to "Floor Console" in this section.
- Remove the floor carpet.
Installation Procedure
- Install the floor carpet.
- Install the floor console. Refer to "Floor Console"in this section
- Install the left and the right front rocker trim panels.
- Install the front seats. Refer to Section 9H, Seats.
- Install the left and the right lower B-pillar trim panels. Refer to "Lower B-Pillar Trim Panel" in this section
- Install the left and the right lower front seat belt anchors to the B-pillar with the bolts.
Tighten
Tighten the seat belt anchor bolts to 38 N•m (28 lb-ft).
- Install the rear seatback. Refer to Section 9H, Seats.
- Install the left and the right rear rocker trim panels. Refer to "Rear Rocker Trim Panel" in this section
- Connect the negative battery cable.
Floor Console
Removal Procedure
- Disconnect the negative battery cable.
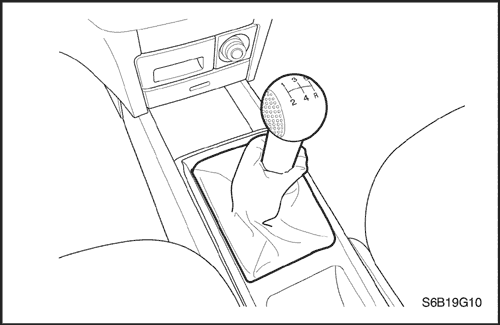
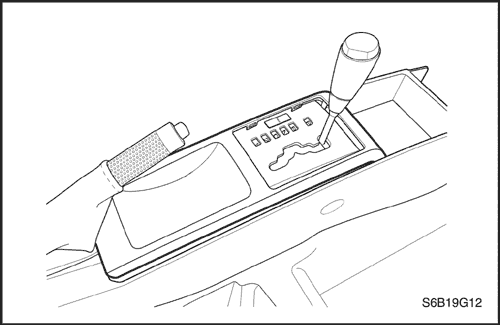
- Remove the gearshift lever boot.
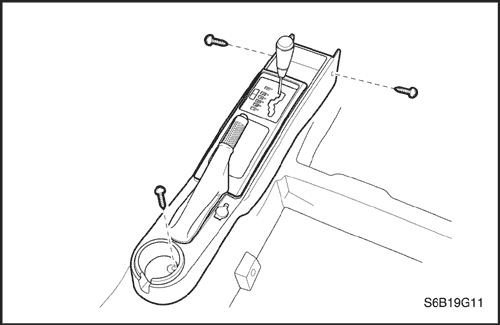
- Remove the screws from the floor console.
- Remove the floor console cover.
- Remove the parking brake cover.
- Disconnect the electrical connector.
- Remove the floor console.
Installation Procedure
- Connect the electrical connector.
- Install the floor console with the screws.
Tighten
Tighten the floor console screws to 4 N•m (35 lb-in).
- Install the parking brake cover.
- Install the gearshift lever boot.
- Install the console cover.
- Connect the negative battery cable.
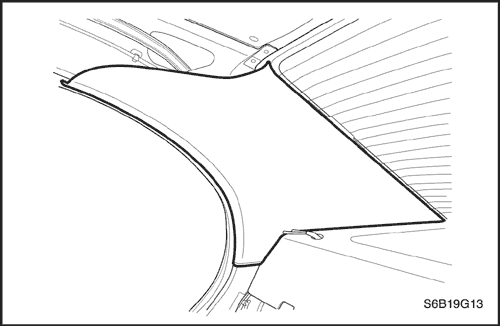
A-Pillar Trim Panel
Removal Procedure
- Pry off the A-pillar trim panel.
- Disconnect the electrical connector.
Installation Procedure
- Connect the electrical connector.
- Install the A-pillar trim panel.
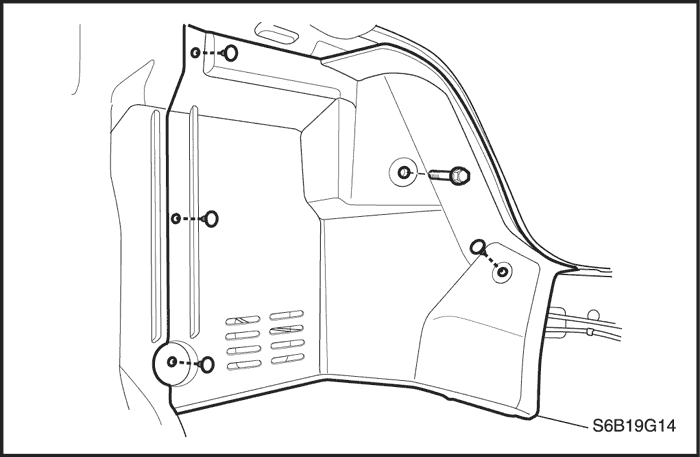
C-Pillar Trim Panel
Removal Procedure
- Remove the C-pillar trim panel.
Installation Procedure
Notice : Dissimilar metals in direct contact with each other may corrode rapidly. Make sure to use the correct fasteners to prevent premature corrosion.
- Install the C-pillar trim panel.
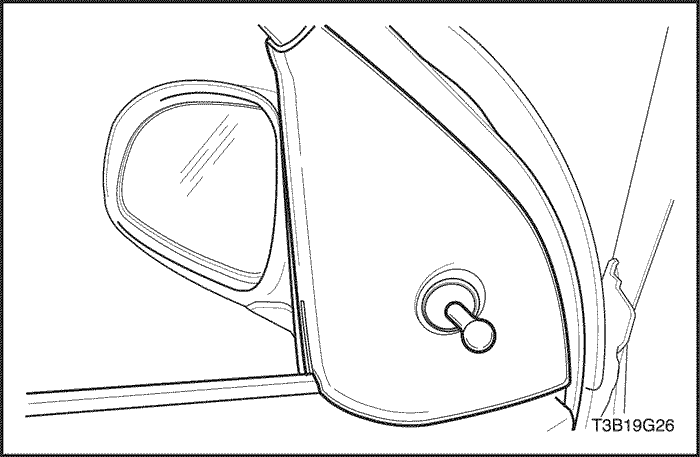
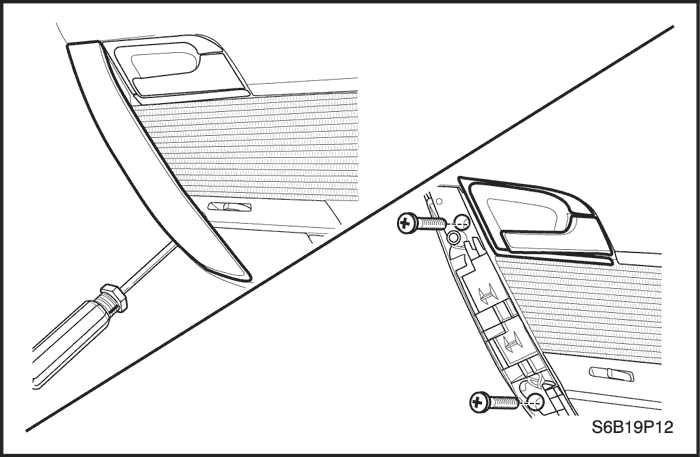
Front Door Escutcheon
Removal Procedure
- Pry off the escutcheon.
Installation Procedure
- Install the escutcheon.
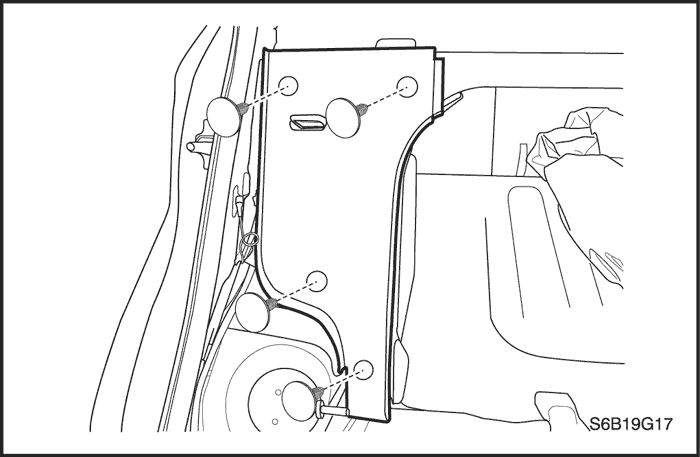
Rear Side Panel Trim
Removal Procedure
- Remove the Lower Back Panel cover. Refer to Lower Back Panel cover. in this section.
- Remove the clips and the rear side panel trim.
Installation Procedure
Notice : Dissimilar metals in direct contact with each other may corrode rapidly. Make sure to use the correct fasteners to prevent premature corrosion.
- Install the rear side panel trim with the clips.
- Install the Lower Back Panel Cover. Refer to Lower Back Panel cover. in this section.
- Install the rear seatback. Refer to Section 9H, Seats.
Rear Wheel House Trim
Removal Procedure
- Remove the rear seatback. Refer to Section 9H, Seats.
- Remove the rear rocker panel cover.
- Remove the front wheel house trim.
- Remove the wheel house brack trim.
- Remove the plastic retaining clips and the rear side panel trim.
Installation Procedure
Notice : Dissimilar metals in direct contact with each other may corrode rapidly. Make sure to use the correct fasteners to prevent premature corrosion.
- Install the rear side panel trim with the plastic retaining clips.
- Install the front wheel house trim.
- Install the front wheel house trim.
- Install the rear rocker panel trim.
- Install the rear rocker seatback. Refer to Section 9H, Seats.
Back Panel Lower Cover
Removal Procedure
- Remove the plastic retaining clips and the back panel lower cover.
Installation Procedure
- Install the back panel lower cover with the plastic retaining clips.
GENERAL DESCRIPTIONAND SYSTEM OPERATION
Interior Trim Panels
The interior trim panels are molded plastic and fasten with screws or plastic clips.
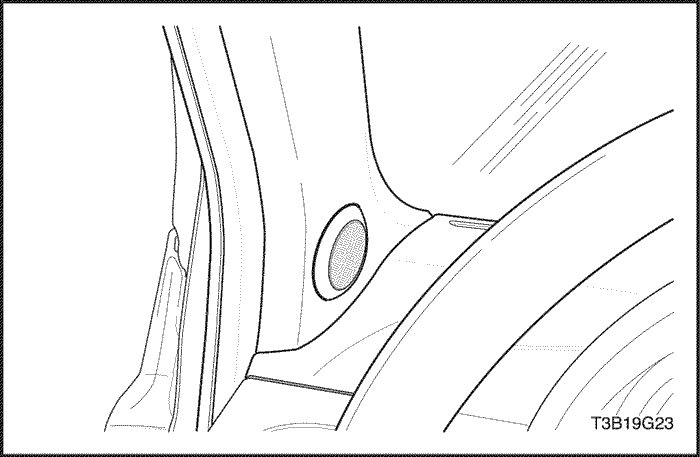
Pressure Relief Vent
When all the windows are closed and the ventilation system is on, the addition of outside air to the interior of the vehicle causes a positive pressure within the vehicle. In order to relieve the pressure, air is released through two pressure relief vents. The pressure relief vents are located at the rear quarter of the vehicle, behind the bumper fascia.
Floor Console
The floor console fits over the tunnel in the floor of the vehicle and extends from under the center of the instrument panel to the rear seat area. The front portion of the console contains the cigar lighter and the transaxle shift lever. The rear portion of the console contains the parking brake lever, the power window switches, (if equipped), and a cupholder.
The sensing and diagnostic module (SDM) for the airbag system is located under the front part of the console.
Floor Carpet
The molded one-piece floor carpet goes over both the front and the rear floor pans.


